Learn How to Change Video Resolution to Suit Different Devices
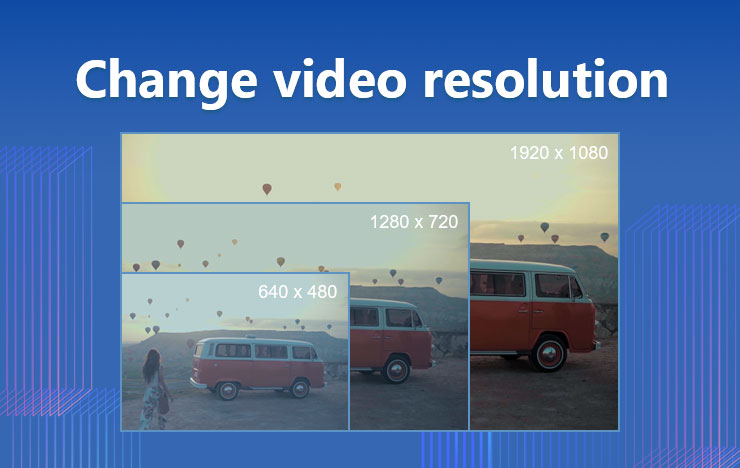
Video resolution will decide how clear the video quality is. If the video resolution is higher, it might simply mean that the video is of high quality. But, quality comes with huge space. When the resolution is high, it will take a huge amount of space. In that case, you have no other option but to change video resolution mp4.
This is the guide where we will see how you can change video resolution without losing the quality. Of course, there will be a slight difference but overall, the video quality will be the same.

- Change Video Resolution using ToolRocket Video Converter
- How to Change Video Resolution from Low to High with VidClipper?
- Final Words
- FAQ
1Change Video Resolution using ToolRocket Video Converter
ToolRocket is one of the popular brands where you can change video resolution on Windows. They have got various tools that will help you to play around with a video. One of their products is a ToolRocket Video Converter. This will help you in changing the video resolution and get the output you want.
We will now see the steps on how to change video resolution.
Step 1: Download the Video Converter
To change video resolution on Windows 10, you will have to download ToolRocket Video Converter. You can simply head over to the website and then hit the download button. You can download the tool for free.

Step 2: Head over to Converter
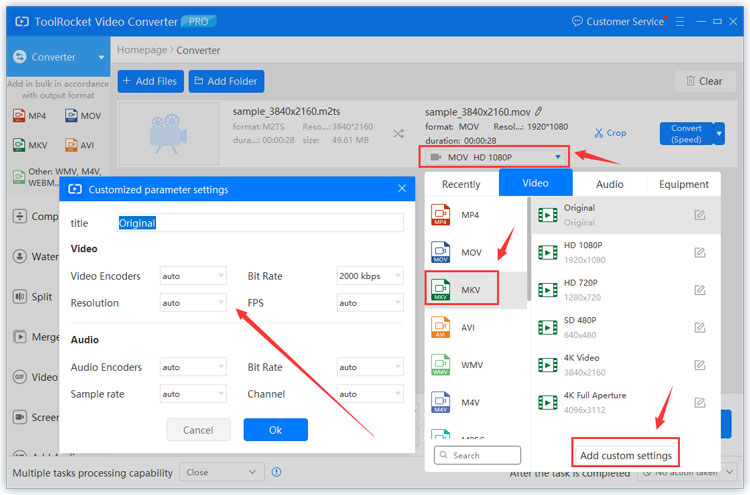
The next step is where you will have to open the video converter. You will see a “Converter” option on the top left side of the software. You can click on it. After clicking on it, you will see various output formats. You will have to select the format in which you want the video to be. If you want to change video resolution MP4, you can click on MP4.
You can then select the resolution whether you the video in 240, 480, or you want to convert it from 1080 to 720. You can simply select it.
Step 3: Add the Files

You can then add the files to the timeline. When you click on the add files button, you will be taken to the explorer from which you can select the files. In the same way, you can also select an entire folder if you want. If you select the folder, the software will take all the files from there. Now, there are individual settings that you can do. For example, if you want to change resolution MP4 on the first file and you want the rest of the files in MKV, you can do that. You can change the name and play around with the metadata of the video if you want.
Step 4: Convert After Finalizing
Now that you have done all the steps, the main question is how to change video resolution, right? For that, you will have to hit the “Convert” button on the right side of the file. If you want to convert all the files altogether, you can click on the “Convert All” button at the bottom. Before that, you can also select the folder where you want your output file. You can select the desired folder before you hit the convert button. Once you are ready, you can click on the convert button and it will start to change video resolution on Windows and it will display a success message after the files are converted.
2How to Change Video Resolution from Low to High with VidClipper?
1. Convert AVI to MP3 with ToolRocket Video Converter
What if the video you are using is of low quality? In that case, you can use VidClipper. It’s software by ToolRocket and allows you to change video resolution from low to high.
VidClipper is a video editor using which you can do it. Let’s see the steps on how to change video resolution on Windows.
Step 1: Download VidClipper
Your first step is to download VidClipper from the official website of ToolRocket. You can install it on your computer thereafter. It’s easy just like all the other tools.
Step 2: Import the Video

Head over to File > Import and select your video. You can also directly import it on the big box given on the top. There will be a small button of “+” using which you can import videos. Once you have imported the video, you will have to drag and drop it on the timeline. The timeline is the space given at the bottom. If you have multiple videos, you can do the same.
Step 3: Edit and Convert

Now, you can edit the video if you want. VidClipper is a video editing tool using which you can edit the video. You can add a transition, effects, audio, etc. You can even combine videos and add an element above them. Many features are using which you can edit the video as per your choice. We will surely discuss it some other day. Right now, let’s focus on changing the resolution from low quality to high quality.
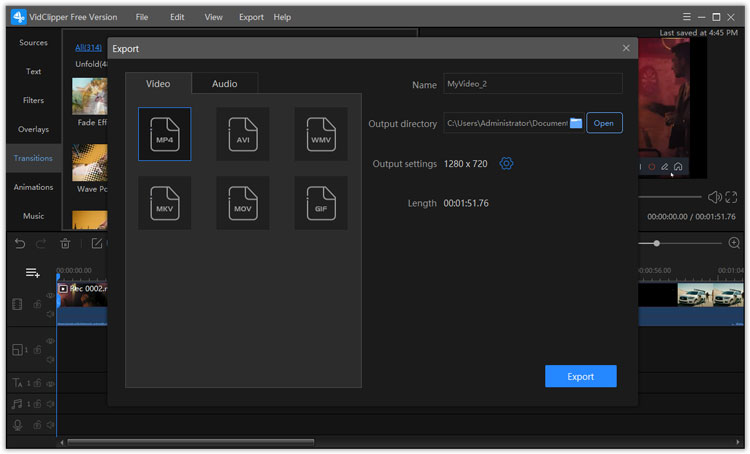
Thereafter, you can click on Export > Local File and then select the resolution you want. This is the place where you will change video resolution MP4. You can select the resolution and hit the export button.
That’s pretty much it. Wait for a while and you will get the high-resolution video ready. It will only increase quality if the quality is stored in the raw file.
3Final Words
To conclude, these are the two quick ways using which you can change video resolution Windows 10. You can use Video Converter to change resolution from MP4 720 to MP4 480 and if you want to do the reverse, you can use the VidClipper.
4FAQ
1. Can I change the video resolution of any video?
Yes, it’s possible to change the video resolution of any video using ToolRocket Video Converter.
2. Is it possible to change the video quality from low to High?
You can use VidClipper to change video quality. If it’s stored in the raw file, you will surely get the output.
3. Will Changing the video resolution decrease the size of the video file?
Yes, if the resolution is less, the size of the video file will also decrease.
